
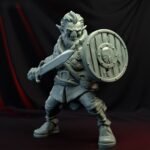

Wildhorn Berserker (Firbolg)
9.99€
Payment Methods:
Specification
3D model format
Total files
License
Slicer settings
Bambu Studio 2.0+
Orca Slicer 2.0+
Ultimaker Cura 5.0+
PrusaSlicer 2.0+
Slic3r 1.3+
Simplify3D 5.0+
Mesh error check
Support
Update requests
Model complexity
Assembly guide
Printing Details
Bambu Studio 2.0+
Starting point for PLA prints in Bambu Studio 2.0+ with a 0.40 mm nozzle: moderate layer heights for detail, 2–3 perimeter walls, 5 top/bottom solid layers (about 1 mm shell), light triangular infill, tree (auto) supports, inner and outer brim for stability, and a prime tower for reliable purging. The full slicer profile may include wider speed and acceleration ranges; the list below keeps only the settings that define overall print quality and reliability. Main characteristics
- Layer height: 0.12–0.20 mm
- First layer height: 0.20–0.28 mm
- Default line width: 0.42 mm
- Outer wall line width: 0.40 mm
- Wall loops: 2–3
- Top shell layers / thickness: 5 / 1.00 mm (Monotonic)
- Bottom shell layers / thickness: 5 / 1.00 mm (Monotonic)
- Sparse infill density: 6%
- Sparse infill pattern: Triangles
- Seam position: Aligned (Smart scarf seam: enabled)
- Support: enabled — Type: Tree (auto)
- Support threshold angle: 10–60°
- Top Z distance: 0.20–0.25 mm
- Brim type: Outer and inner — Brim width: 5.00 mm
- Prime tower: enabled (Width: 35 mm)
- Filament type: PLA — Diameter: 1.75 mm
- Flow ratio: 0.90–1.10
- Nozzle temperature: 220–270 °C
- Bed temperature (PEI / textured): 65 °C
- Max volumetric speed: 12 mm³/s
- Cooling: Min fan 60% / Max 80%; Min layer time 90 s; forced cooling for overhangs and bridges
- Extruder: Direct drive — Nozzle diameter: 0.40 mm
- Layer height limits (printer): 0.08–0.35 mm
Orca Slicer 2.0+
General-purpose PLA profile for Orca Slicer 2.0+ with a 0.4 mm nozzle: fine layer heights, Arachne wall generation, 2–3 perimeter loops, 5 top/bottom solid layers (about 1 mm shell), light triangular sparse infill, and tree (auto) supports with a fixed 60° overhang threshold. Outer and inner brim improves bed adhesion; seam handling uses an aligned seam with a small seam gap. Cooling is tuned for small layers and overhangs; the figures below are the main reference values—adjust speeds and volumetric limits to match your printer and filament. Main characteristics
- Layer height: 0.12–0.20 mm
- First layer height: 0.20–0.28 mm
- Default line width: 0.42 mm
- Outer wall line width: 0.40 mm
- Wall generator: Arachne
- Walls printing order: Inner/outer
- Wall loops: 2–3
- Top shell layers / thickness: 5 / 1.00 mm (Monotonic line)
- Bottom shell layers / thickness: 5 / 1.00 mm (Monotonic)
- Sparse infill density: 5%
- Sparse infill pattern: Triangles
- Sparse infill direction: 45°
- Seam position: Aligned (Seam gap: 10%)
- Ironing: Off
- Support: enabled — Type: Tree (auto)
- Support threshold angle: 60°
- Top Z distance: 0.20–0.25 mm
- Bottom Z distance: 0.20–0.25 mm
- Support wall loops: 0
- Support/object XY distance: 0.40 mm
- Brim type: Outer and inner — Brim width: 5.0 mm
- Filament type: PLA
- Flow ratio: 0.90–1.10
- Nozzle temperature: 190–270 °C
- Bed temperature (smooth / textured PEI): 55 °C
- Max volumetric speed: 21 mm³/s
- Cooling: No fan on first layer; full fan from layer 3; Min 70% / Max 80%; Min layer time 80 s; forced cooling for overhangs and bridges
- Nozzle diameter: 0.4 mm
- Layer height limits (printer): 0.1–0.3 mm
- Retraction / Deretraction speed: 40 mm/s
UltiMaker Cura 5.0+
Baseline PLA guidance for UltiMaker Cura 5.0+: use 0.12–0.20 mm layers for detail or speed respectively, and prefer 0.20 mm for small pins and snap-fit connectors. Walls default to two perimeters (~0.80 mm thick) with an option to raise wall count to three for stronger mechanical parts. Infill is light triangular grid by default, with a separate recommendation of about 50% infill for pins and connector-style elements. Supports combine normal structures (flat/mechanical areas) and tree supports (organic models); overhang and tree angles should be calibrated to your printer and filament. Speed and acceleration ranges are intentionally wide—use the lower end on older machines (for example classic Ender-3 class) and the upper end only when the printer is verified stable. Retraction values below assume a typical direct drive; Bowden setups usually need longer retraction and tuning. Main characteristics
- Layer height: 0.12–0.20 mm (use 0.20 mm for pins and snap connectors)
- Initial layer height: 0.20 mm (about 120–150% of layer height)
- Default line width: 0.42 mm
- Outer wall line width: 0.40 mm
- Inner wall line width: 0.42 mm
- Top/bottom line width: 0.44 mm
- Infill line width: 0.40 mm
- Wall line count: 2 (use 3 for stronger parts)
- Wall thickness (reference): 0.80 mm
- Wall ordering: Inside to outside (optimized wall order: enabled)
- Top/bottom thickness: 1.00 mm each (pattern: Lines)
- Initial bottom layers: 4–5
- Extra skin wall count: 1
- Ironing: Off
- Infill density: 5–30% (use ~50% for pins and connectors)
- Infill pattern: Triangles
- Infill overlap: 30%
- Printing temperature: 210 °C (all listed print temps in profile)
- Build plate temperature: 60 °C (initial layer and main)
- Flow: 98–102% (Wall flow offset: −0.1% in profile)
- Print speed: 60–160 mm/s (choose low end on weaker hardware)
- Wall speed: 30–90 mm/s (outer), 40–80 mm/s (inner)
- Top/bottom speed: 40–100 mm/s
- Travel speed: 100–250 mm/s
- Initial layer speed: 15–30 mm/s
- Acceleration control: On (print acceleration range: 500–3000 mm/s²—tune to machine)
- Retraction: On — Distance: 0.8 mm (calibrate; Bowden typically higher)
- Retraction speed: 35–50 mm/s (retract/prime in profile: 40 mm/s)
- Combing mode: All — Retract before outer wall: On — Z hop when retracted: On
- Cooling: On — Fan ramps up by layer/height (regular fan from ~0.5 mm / layer 3)
- Maximum fan speed: 100% — Minimum layer time: 5 s — Minimum speed: 10 mm/s
- Supports: Normal supports + Tree supports enabled (placement: Everywhere)
- Support overhang angle: 45–65° (calibrate to printer and filament)
- Support pattern (normal): Zig Zag — Support Z distance: ~0.24 mm (adjust if hard to remove)
- Support XY distance (normal): 0.80 mm (increase if supports bond to walls)
- Support interface: On (roofs/floors on; concentric interface for normal, grid-style interface in tree section per profile)
- Tree supports (summary): Max branch angle 45°, branch diameter 5 mm, trunk 25 mm, tip 0.8 mm, branch density 30%
- Bed adhesion — Skirt option: 3 lines, skirt distance 10 mm, minimum skirt/brim length 250 mm (older printers)
- Bed adhesion — Brim option: Outside only, brim width 10 mm, smart brim: On (tall/small-footprint parts)
- Z seam: User specified — Position: Back (example coordinates in profile: Y 200 mm)
PrusaSlicer 2.0+
General PLA workflow for PrusaSlicer 2.0+: choose 0.12–0.20 mm layer height for quality versus speed, and use about 0.20 mm for small pins and snap-style connectors. Shells use 2–3 perimeters with four solid top/bottom layers at 0.2 mm layer height, plus minimum shell thickness targets of about 0.80 mm top and bottom. Infill stays light (6% triangles) with monotonic-style solid surfaces; enable supports when needed, combining grid-style contact settings with organic (tree) branches for complex geometry. Speed and acceleration spans are wide by design—stay near the minimum values on older printers and move up only after calibration. Calibrate extrusion multiplier and overhang threshold to your machine and filament. Main characteristics
- Layer height: 0.12–0.20 mm (use 0.20 mm for pins and snap connectors)
- First layer height: 0.18–0.28 mm (about 120–150% of layer height)
- Perimeters: 2–3
- Solid top layers: 4 (at 0.20 mm layer height)
- Solid bottom layers: 4
- Minimum shell thickness (top/bottom): 0.80 mm each
- Extra perimeters if needed: On
- Ensure vertical shell thickness: Enabled
- Perimeter generator: Arachne
- External perimeters first: On
- Fill gaps: On
- Seam position: Aligned (Seam gap distance: 15%)
- Scarf joint placement: Nowhere
- Infill density: 6%
- Fill pattern: Triangles
- Top fill pattern: Monotonic Lines
- Bottom fill pattern: Monotonic Lines
- Infill anchor length: 10.00 mm (max anchor: 10.00 mm)
- Infill/perimeters overlap: 25%
- Bridge flow ratio: 0.95
- Ironing: Off
- Skirt: 0 loops (minimum), height 1 layer, distance 6 mm, min extrusion length 50 mm
- Brim: Outer only — Width: 5.00–8.00 mm (optional for small prints with weak bed adhesion)
- Brim separation gap: 0.12 mm
- Support material: On — Auto-generated supports: On
- Overhang threshold: 60° (profile notes calibrating around 45–50° depending on printer)
- Enforce support for the first: 2 layers
- First layer density: 90% — First layer expansion: 3.0 mm
- Raft layers: 0
- Support style (contact): Grid
- Top/Bottom contact Z distance: 0.24 mm each (raise slightly if supports are hard to remove)
- Support pattern: Rectilinear — Pattern spacing: 2.5 mm
- Top/Bottom interface layers: 2 / 2 — Interface pattern: Concentric
- XY separation (object vs support): 1.00 mm
- Don’t support bridges: On
- Organic supports: Max branch angle 45°, preferred 30°, branch diameter 2 mm, tip 0.80 mm, branch distance 1 mm, density 30%
- Default extrusion width: 0.44 mm
- Perimeters: 0.44 mm — External perimeters: 0.42 mm
- Infill / solid infill: 0.44 mm — Top solid infill: 0.40 mm — Support material: 0.36 mm
- First-layer extrusion width: widen for adhesion (typical guidance ~150% of a 0.4 mm nozzle; tune in slicer)
- Filament type: PLA — Extrusion multiplier: 1.0 (calibrate)
- Print speeds: wide ranges (perimeters ~25–200 mm/s, infill ~50–250 mm/s—pick conservative values on entry-level printers)
- First layer speed: 15–30 mm/s
- Travel speed: 100–150 mm/s
- Acceleration: per-category ranges 500–7000 mm/s² (use low defaults without tuning)
- Auto cooling: On — Fan min/max (PLA): 50% / 100%
- Fan off for the first: 2 layers — Full fan speed at layer: 4
- Bridges fan speed: 100%
- Cooling thresholds: slow down if layer time below ~9 s; min print speed ~20 mm/s
Slic3r 1.3+
Legacy-oriented PLA profile for Slic3r 1.3+, tuned around a 0.40 mm nozzle. The baseline layer height in the preset is 0.12 mm for maximum surface quality; switch to about 0.20 mm for faster prints and for small pins or snap-fit connectors. With 0.12 mm layers, the profile uses eight solid top and bottom layers to keep surfaces smooth. Infill is sparse (5% rectilinear) with combined infill every two layers to save time—use roughly 50% infill for pins and connector-style parts. Supports use a rectilinear pattern with a small Z gap; calibrate the overhang limit to your printer (the notes suggest roughly 45–60°). Speed and acceleration bands are wide: favor the lower end on older hardware. Retraction values assume a typical direct drive; Bowden setups usually need more retraction length and tuning. Main characteristics
- Layer height: 0.12 mm (use ~0.20 mm for faster prints, pins, and snap connectors)
- First layer height: 0.18 mm (about 120–150% of layer height)
- Perimeters: 2
- Solid top layers: 8 (for 0.12 mm layer height)
- Solid bottom layers: 8 (for 0.12 mm layer height)
- Extra perimeters if needed: On
- Avoid crossing perimeters: On
- Detect thin walls: Off
- Detect bridging perimeters: Off
- Seam position: Aligned
- External perimeters first: Off
- Infill density: 5% (use ~50% for pins and connectors)
- Top/Bottom fill pattern: Rectilinear
- Combine infill every: 2 layers
- Fill angle: 45°
- Solid infill threshold area: 70 mm²
- Fill gaps: On
- Only retract when crossing perimeters: On
- Infill before perimeters: Off
- Skirt: 3 loops minimum, distance 5 mm, height 1 layer, min extrusion length 50 mm (recommended for older printers)
- Brim: Exterior width 8.00 mm — Interior width 3.00 mm (optional 5–8 mm range noted for small prints with poor adhesion)
- Support material: On
- Overhang threshold: 60 (calibrate to roughly 45–60° depending on printer and filament)
- Support contact Z distance: 0.15 mm (increase slightly if supports are hard to remove)
- Support pattern: Rectilinear — Pattern spacing: 2.50 mm — Pattern angle: 0°
- Support interface layers: 3 — Interface pattern spacing: 0.00 mm
- Default extrusion width: Auto
- Filament type: PLA — Extrusion multiplier: 1.00 (calibrate roughly 0.9–1.1)
- Nozzle temperature: 220 °C (first layer and other layers)
- Bed temperature: 60 °C (first layer and other layers)
- Print speeds: wide ranges (perimeters ~25–200 mm/s, infill ~50–160 mm/s—use conservative values on entry-level printers)
- First layer speed: 15–30 mm/s
- Travel speed: 100–250 mm/s
- Acceleration (advanced): perimeters/infill/bridge ~500–3000 mm/s²; first layer ~500–1000 mm/s²; default ~500–4000 mm/s²
- Cooling: On — Keep fan always on: On — Fan speed: 80–100%
- Bridges fan speed: 100%
- Disable fan for the first: 1 layer
- Cooling thresholds: enable fan if layer time below ~60 s; slow down if below ~5 s; min print speed ~10 mm/s
- Nozzle diameter: 0.40 mm
- Retraction length: 1.00 mm (Bowden typically higher—calibrate)
- Retraction Z lift: 0.30 mm — Retraction speed: 45 mm/s
- Minimum travel after retraction: 2.00 mm
- Z offset: 0.00 mm (calibrate for bed adhesion)
Simplify3D 5.0+
Reference PLA-style setup for Simplify3D 5.0+ on a 0.4 mm nozzle, with automatic extrusion width and an extrusion multiplier starting point of 0.98 (calibrate with test prints). Layers target 0.12–0.20 mm for quality versus speed; use about 0.20 mm for pins and snap connectors. The profile enables adaptive layer heights for rounded or character models. Shells use five solid top and bottom layers (noted for 0.20 mm layer height) and two outline perimeters, with an option to raise perimeters to three for stronger parts. Sparse infill is light Gyroid at 7% with combined infill every two layers; use roughly 50% infill for pins and connector-style features. Supports use an aligned pattern at 30% with tuned horizontal separation. Speed and acceleration ranges are broad—use conservative values on older printers. Retraction assumes a typical direct drive; Bowden machines usually need longer retract distance. Main characteristics
- Nozzle diameter: 0.4 mm
- Filament diameter: 1.75 mm
- Extrusion multiplier: 0.98 (calibrate)
- Extrusion width: Automatic
- Layer height: 0.12–0.20 mm (use 0.20 mm for pins and snap connectors)
- Adaptive layer heights: On — Min / Max: 0.08–0.24 mm — Smoothing level: 5.0
- Top solid layers: 5 (for 0.20 mm layer height)
- Bottom solid layers: 5 (for 0.20 mm layer height)
- Outline perimeters: 2 (use 3 for stronger parts)
- Outline printing order: Inside-out
- First layer height: 100% (relative to primary layer height)
- First layer width: 150%
- First layer speed: 30% (relative to configured speeds)
- Horizontal outer/inner size compensation: 0.00 mm each (prefer extrusion calibration)
- Skirt/Brim: Skirt enabled — Skirt layers: 1 — Skirt offset: 0.00 mm — Skirt outlines: 1–2 (use ~10–20 outlines for a brim-style prime ring)
- Raft: Off — Prime pillar: Off — Ooze shield: Off
- Sparse infill pattern: Gyroid — Infill percentage: 7% (use ~50% for pins and connectors)
- Combined infill layers: 2
- Outline overlap: 15% — Minimum infill length: 5.00 mm
- Dense infill layers: 0 — Dense infill percentage: 50% (when dense sections are used)
- External (solid) infill pattern: Rectilinear — Solid infill threshold area: 25.00 mm²
- Add solid diaphragms: Off
- Support infill pattern: Aligned — Support infill percentage: 30%
- Support outlines: 0 — Base support layers: 0 — Combined support layers: 1
- Support inflation distance: −0.01 mm
- Dense support layers (upper/lower): 0 — Dense support infill: 70% (when dense supports are used)
- Support horizontal offset from part: 0.24 mm (increase slightly if supports are hard to remove)
- Extruder temperature: 230 °C (verify against your PLA brand)
- Heated bed temperature: 60 °C
- Cooling: Fan 0% at layer 1 — Fan 100% from layer 2
- Default printing speed: 40–160 mm/s (pick lower end on weaker printers)
- Outer perimeter speed: 50% of default — Inner perimeter speed: 80%
- Solid infill speed: 80% — Sparse support speed: 80% — Dense support speed: 70%
- XY travel speed: 200 mm/s — Z travel speed: 15 mm/s
- XY acceleration: 500–3000 mm/s² — Z acceleration: 150–600 mm/s² — Extruder acceleration: 1000–4000 mm/s²
- XY jerk: 10–25 mm/s — Z jerk: 0.30–0.50 mm/s — Extruder jerk: 5 mm/s
- Speed overrides: On (slows very fast layers and short perimeters)
- Bridging: Unsupported area threshold 50 mm² — Bridging extrusion multiplier 95% — Bridging speed multiplier 30%
- Retraction: On — Distance: 0.80 mm — Vertical lift: 1.00 mm — Speed: 40 mm/s
- Ooze control: Only retract when crossing open spaces — Force retraction between layers: On
- Thin walls: External — Perimeters only; Internal — Allow gap fill
Source Files
This 3D model comes with StereoLithography (.STL) files optimized for 3D printing. You'll get digital files, not a physical product.
Files are available for download after purchase.
See the Specifications sections for more details about this model.